Businesses can serve their customers more efficiently when customer data is well-organized and easy to locate. One way to organize customer data is by associating CRM records with each other. For example, a support team can associate Cases to Accounts in Nextiva CRM to quickly view all interactions and requests coming from any given customer to identify trends. If a particular customer encounters the same issue more than once, the support representative can make sure to get to the heart of the problem.
Nextiva CRM offers Users the functionality to create these associations, or relationships, between records. When Users create a new record, they can automatically associate it with another record from the Related tab of a Workspace. For example, Users can create a new Contact from the Related tab of the Account Workspace and automatically associate it to the Account.

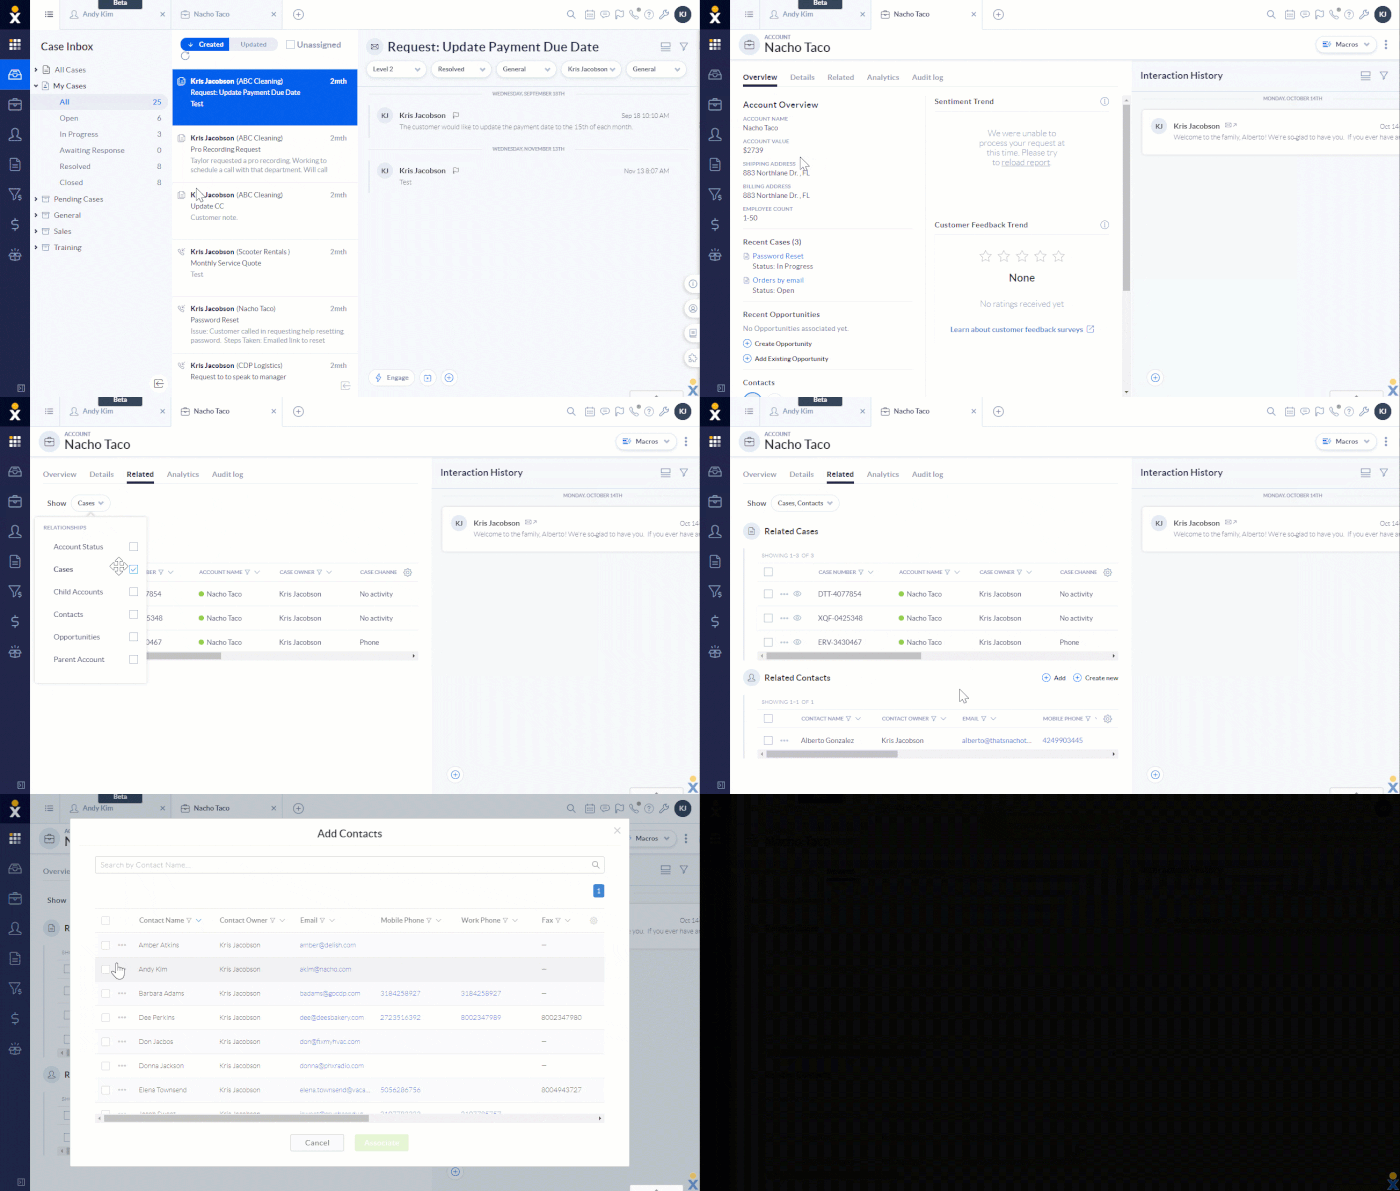
Associating a Contact to an Account
- Visit www.nextiva.com, and click Client Login to log in to NextOS.
- From the NextOS Home Page, select CRM.
- From a CRM table (e.g. list of Accounts), select the desired record to open its Workspace.
- On the Related tab, click the Show button and select the type(s) of records to display (Accounts, Cases, Contacts, Opportunities, Child/Parent records, Attachments, Products).
NOTE: The available record types listed in the drop-down menu will vary depending on the Workspace.
- Hover over the record type (e.g. Related Contacts) and click Add to select from existing records in the system or Create new to create a new record.
- Add: From the Add Record dialog box, select the checkboxes corresponding to the desired records, then click Associate.
- Create new: On the New Record form, complete the fields and click Create.
Creating associations between records help businesses to organize customer data to make it more meaningful and easily accessible.
Related Articles:
- Accounts in Nextiva CRM
- Contacts in Nextiva CRM
- Cases in Nextiva CRM
- Leads in Nextiva CRM
- Opportunities in Nextiva CRM
- Products in Nextiva CRM
