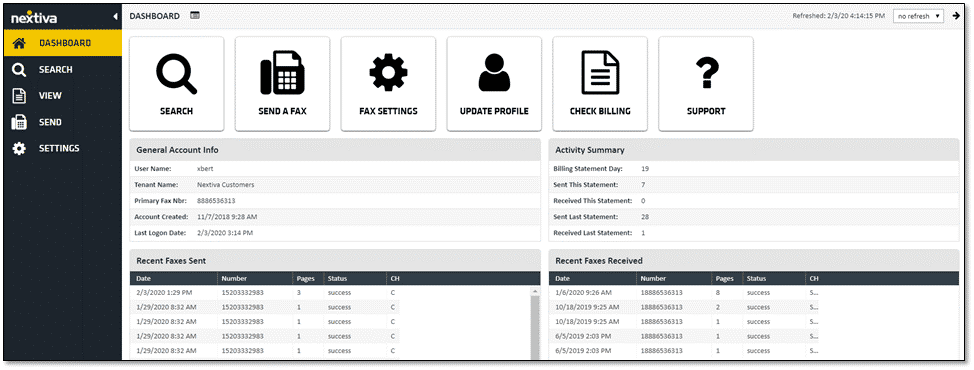
You have many different customizable options within the Nextiva vFAX Portal that can help you personalize and optimize your Nextiva faxing experience. From the fax portal, you can change your primary email address, set up notifications, reset your password, check your page usage for the month, and more.
- You can access the vFAX portal by clicking HERE. Be sure to select the checkbox acknowledging the Terms and Conditions and click Submit.
NOTE: If you have trouble logging in or have lost your password, click the Password Recovery option under Remember My Username.
-
Click Fax Settings from the Dashboard or Settings from the left panel to access the vFAX settings.

Profile Tab
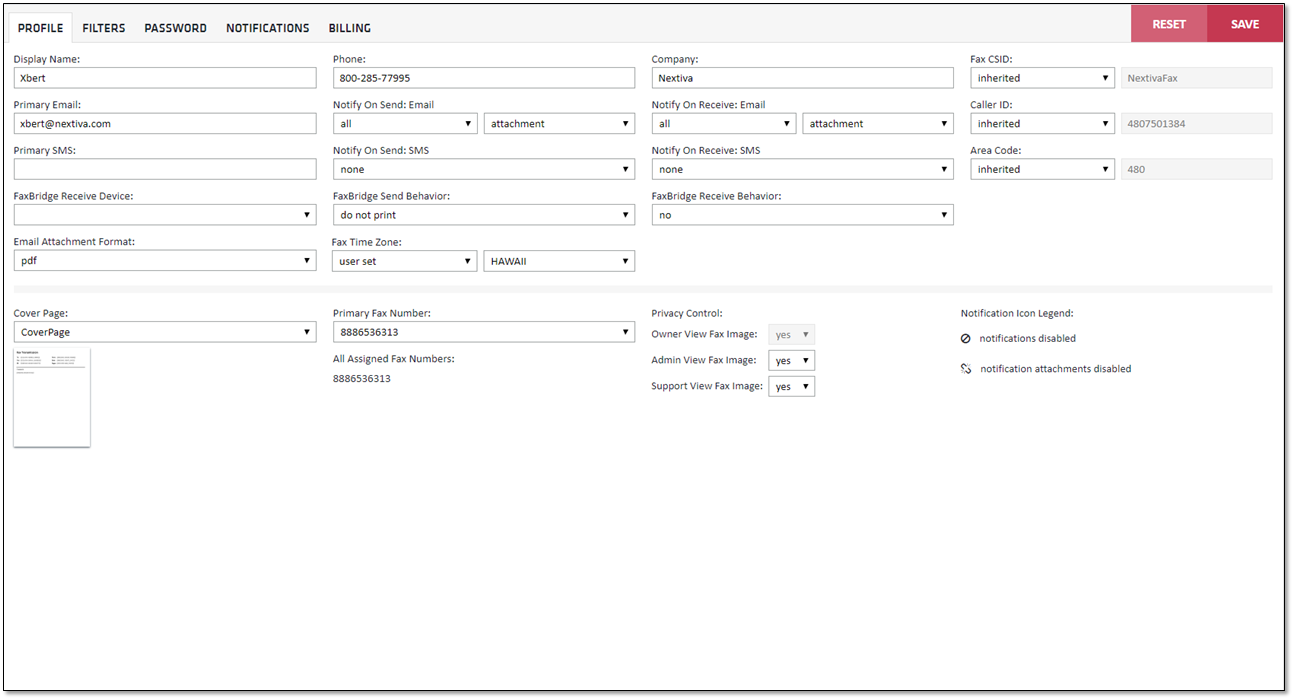
Manage cover page details, the primary email address to send faxes from, notification preferences, and more under the Profile tab.

Row One:
- Display Name: The name that will appear on the cover page.
- Phone: The phone number that will appear on the email notifications.
- Company: The name of the business that will appear on the email notifications.
- Fax CSID: The name that will appear on the receiving caller ID. By default, it is set to “NextivaFax.” To update the CSID, click the Inherited drop-down menu and select User Set, then enter the desired ID to be displayed on the Caller ID.
Row Two:
- Primary Email: The primary email address to send faxes from.
- Notify on Send/Notify on Receive: Email: Choose to be notified at the primary email on file for all, only successful, or only failed fax transmissions for both sent and received faxes. The email notifications will include a link to the Nextiva vFAX portal, where Users can view the fax. To receive faxes as a PDF file attached to the email notifications, make sure Notify On Send/Notify on Receive is set to include an Attachment.
- Caller ID: The fax number that will appear on the receiving caller ID. By default, the caller ID will display the primary fax number assigned to the account and cannot be changed.
Row Three:
- Primary SMS: Set up text notifications for both sent and received faxes. To receive text notifications, add a cell phone number followed by the cell phone provider’s SMS address in the Primary SMS field. Here are some common ones:
- ATT: [email protected]
- T-Mobile: [email protected]
- Sprint: [email protected]
- Verizon: [email protected]
- Notify on Send/Notify on Receive: SMS: Choose to receive text notifications for all, only successful, only failed fax transmissions for both sent and received faxes.
- Area Code: This is for routing purposes only and is not visible on any of the faxes. By default, it is set to “480.”
Row Four:
- Fax Bridge Receive Device: This field is used when assigning a Nextiva Fax Bridge to the User.
- Fax Bridge Send Behavior: Set the Fax Bridge to print confirmations for all outbound faxes automatically.
- Fax Bridge Receive Delivery: Set the Fax Bridge to print all inbound faxes to the fax machine automatically. Users can also set a schedule for specific days and times to automatically print all incoming faxes.
Row Five:
- Email Attachment Format: By default, all email attachments are sent as a .pdf file.
- Fax Time Zone: Set the preferred time zone displayed in the portal and the timestamp on all outgoing faxes.
Row Six:
- Cover Page: Enable or disable the cover page. By default, the cover page is included with all outbound faxes.
- Primary Fax Number: The fax number displayed on the Caller ID and the header on each page.
- Privacy Control: Allow permission to view the fax data when contacting Nextiva support.
NOTE: If you need to change the primary fax number, please contact Support at vFAX Support or submit a ticket.
Make sure to click Save to ensure all settings are adjusted.
Filters Tab
Create Types or Folders for easy archiving and organization of faxes under the Filters tab. Users can assign faxes to specific Types or Folders and easily filter faxes in the portal to only show faxes assigned to a particular Type or Folder. Make sure to click Save to ensure all Filters are adjusted.
NOTE: All faxes will still be displayed under Search, even if assigned to a Type or Folder.

Password Tab
Every Nextiva vFAX User receives a unique username and temporary password upon sign-up. The Password tab is available for password changes.
NOTE: This will not change your password for the vFAX Billing Portal.

Notifications Tab
Here you can specify additional email addresses or SMS notifications if you want multiple people to receive notifications for all inbound or outbound faxes (Figure 1-8). Click Save in the upper right-hand corner to ensure all changes are saved.

Billing Tab
Here, you can view your Billing Statement Day of Month and Usage Summary for the current billing cycle, such as total faxes sent and received as well as total pages sent and received.
NOTE: To update your billing information, you will need to log in to the vFAX Billing Portal HERE.
