- Visit nextiva.com, and click Client Login to log in to NextOS.
- From the NextOS Home Page, select Analytics.
- Select Reports in the left navigation panel.
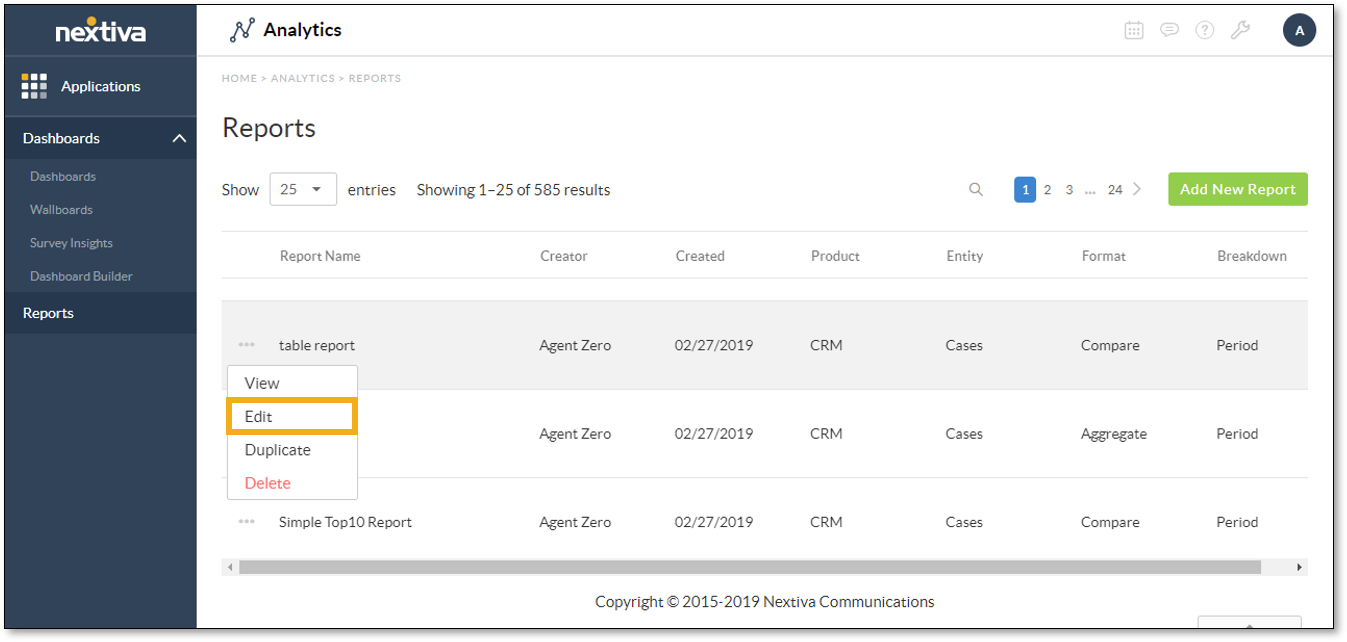
- In the Reports view, click the Ellipsis (…) icon corresponding to the desired report, then select Edit.

- Make the desired changes:
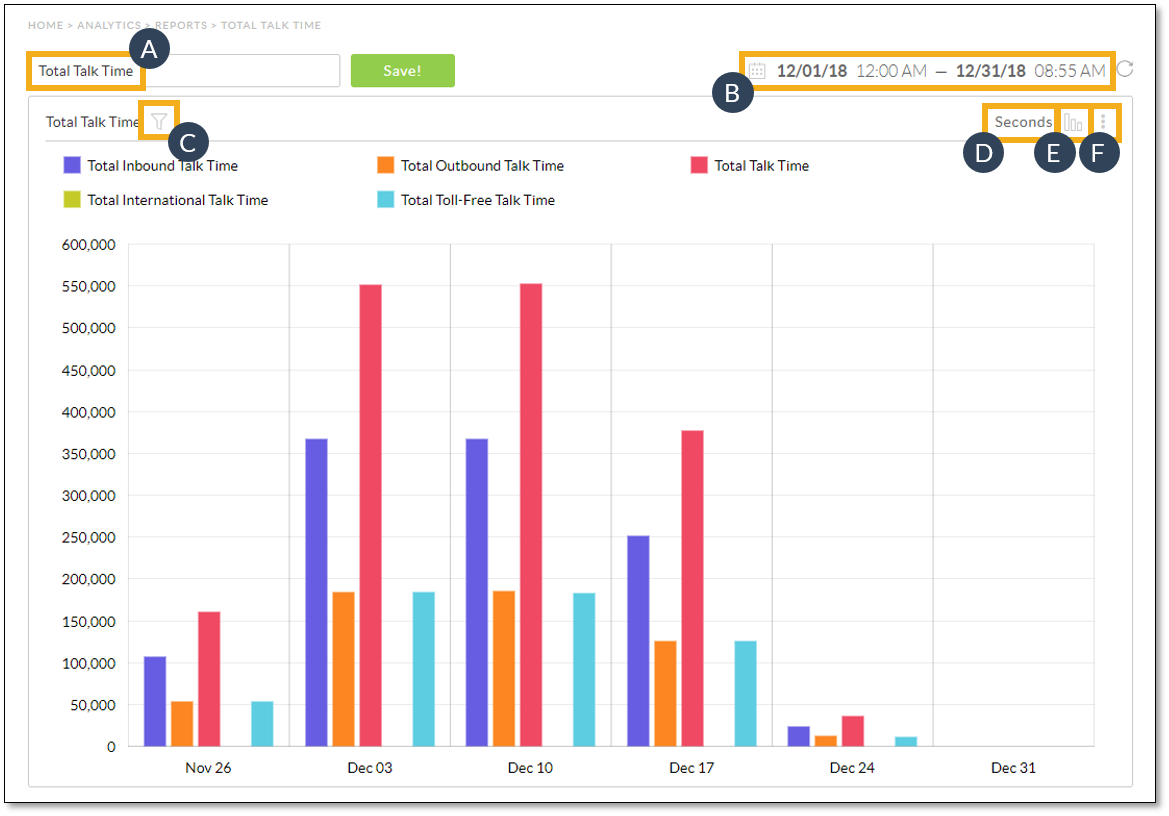
- Edit the report name:
- Click the report name.
- Change the name.
- Click Save.
- Edit the time period for the report to cover.
- Filter the data in the report to limit the results. For more information on filtering report data, click here.
- Select the time unit by which to display the data: Seconds, Minutes, Hours, Days, Weeks.
NOTE: This option is only available when the value being measured is a duration.
- Select the chart type: Column, Line, Table, Stack, Pie, or Scatter.
- Export the data. For information on exporting reports, click here.

- Click Save.
NOTE: All changes made to a saved report will display in any dashboard chart created using that saved report.
Related Articles:
- What is Report Builder in Nextiva Platform Analytics?
- Creating Reports in Nextiva Platform Analytics
- Viewing Reports in Nextiva Platform Analytics
- Filtering Report Data in Nextiva Platform Analytics
- Duplicating Reports in Nextiva Platform Analytics
- Deleting Reports in Nextiva Platform Analytics
- Exporting Reports in Nextiva Platform Analytics
