Nextiva Unity is a tool that allows your User, Reception, Call Center Agent or Call Center Supervisor manage their calls and tasks in an easy to use desktop application. With Nextiva Unity, you can easily manipulate your calls, see the busy status of your fellow employees and find out how you and your call queues are doing in a real-time environment.
System Requirements:
- Nextiva Unity will require approximately 500MB of hard drive space on the local machine.
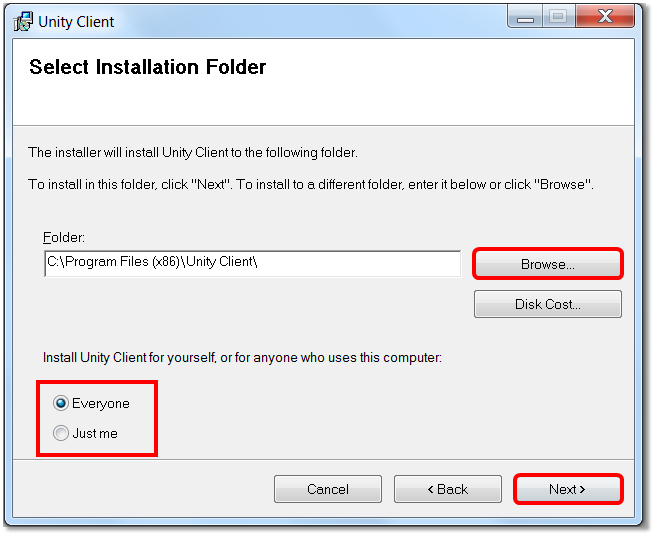
- By default, the install directory is C:\Program Files\Unity Client.
- Unity can be rolled out as an MSI file, which supports Active Directory group profiles.
- Unity is only supported on Windows 8.1, 10, and 11. Both 32 and 64-bit versions of Windows are supported.
Minimum computer specifications:
- CPU: Dual core 3Ghz.
- RAM: 4GB.
- Video Card: 256MB onboard RAM.
Unity Firewall Rules:
FQDN: portal.unityclient.com
- IP Addresses:
- 185.42.19.40
- 83.142.25.185
- TCP Port:
- 443, outbound only
FQDN: im.unityclient.com
- Existing IP Addresses:
- 185.42.19.38
- 83.142.25.183
- NEW IP addresses (Effective 6/9/24):
- 52.17.201.131
- 99.80.25.98
- 54.73.202.3
- TCP Ports: 2208, 2209, 8011 & 8012
Unity Web Applications
- IP Addresses:
- 185.17.172.185
- 85.13.237.8
To Install Nextiva Unity Desktop:
- After receiving the Nextiva Unity installation file, double-click the file to open. If you do not have the file, click one of the links below:
Unity Desktop for non-HIPAA customers
Unity Desktop for HIPAA customer
NOTE: HIPAA accounts require a different server to be entered during the initial setup. Enter cp.nhc.nextiva.com when setting up Unity for a HIPAA account.
NOTE: You may be prompted with a message requesting permission to run the file. Click the Run button to accept.
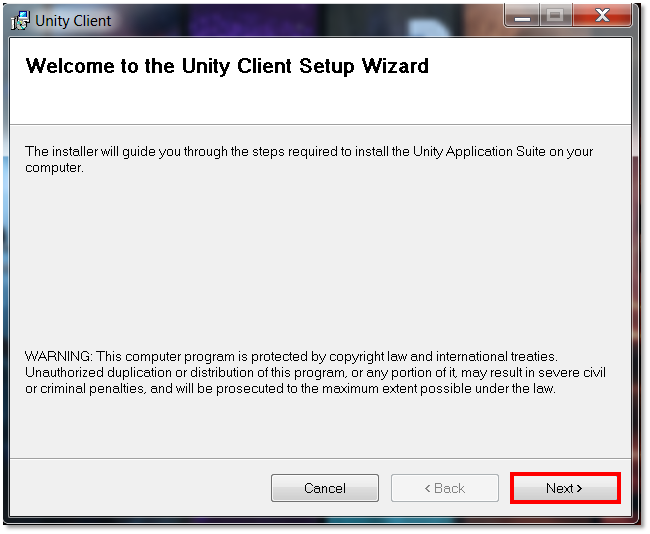
- Click Next on the Welcome to the Unity Client Setup Wizard window.
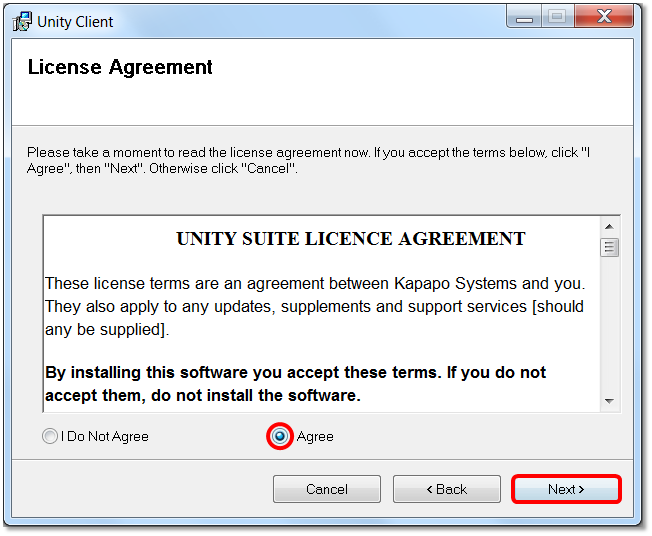
- Select the radio button next to I Agree to agree to the License Agreement, then click Next.
- Select an installation folder by clicking Browse and locating a preferred location, or accept the default location. Select a radio button to install Nextiva Unity for your profile, or for anyone who uses the workstation.
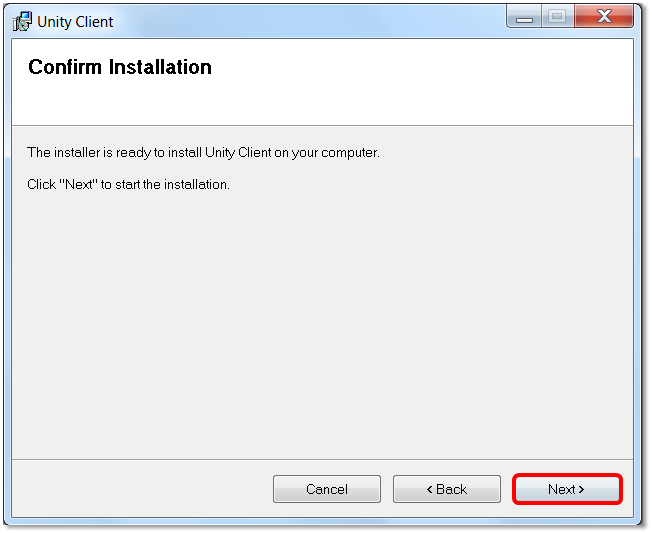
- Click Next to confirm the installation.
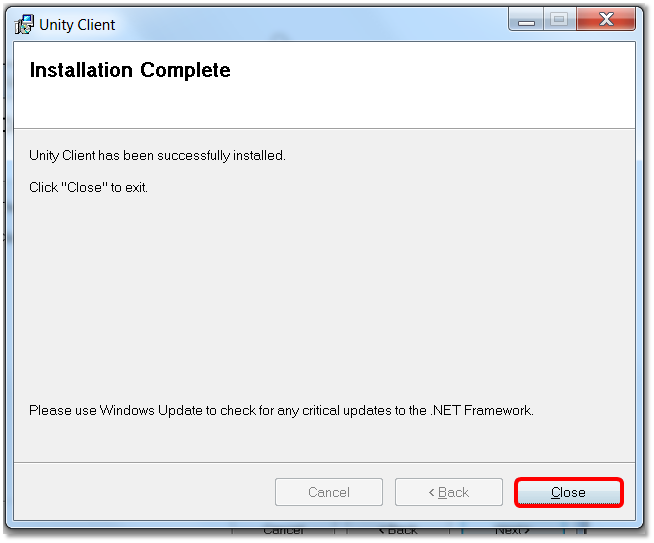
- Once the installation completes, click Close to exit the installer. Nextiva Unity is now installed.
- Locate the Unity shortcut that will be either on the desktop or in the Start menu.
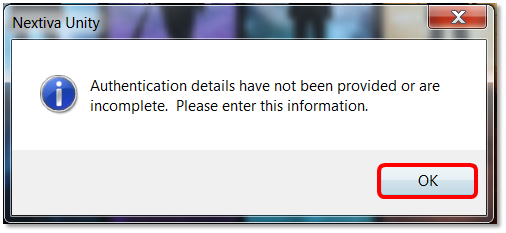
- Nextiva Unity will display the message “Authentication details have not been provided or are incomplete. Please enter this information”.
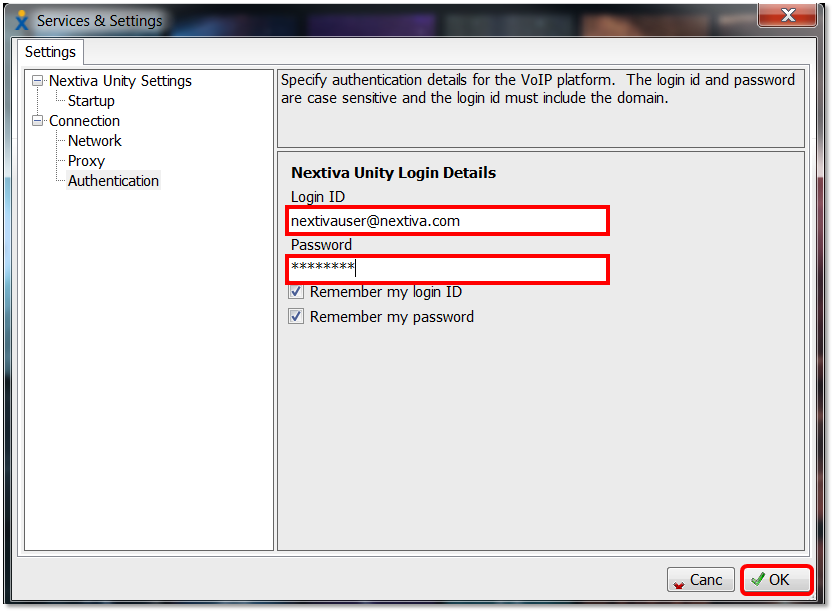
- Enter your login credentials. The login credentials are the same credentials used to access the Nextiva Voice Portal. If you do not have your credentials, please see your System Administrator. Once finished, click OK.
Related Articles:
- Manually Upgrading Nextiva Unity Desktop
- Nextiva Unity Agent Interface
- Nextiva Unity Reception Interface
- Nextiva Unity Supervisor Interface
- Managing Calls from Nextiva Unity
- Managing Call Recording from Nextiva Unity
- Transferring a Call from Nextiva Unity
- Escalating a Call to a Supervisor
- Sending Instant Messages from Nextiva Unity
- Silent Monitoring from Nextiva Unity Supervisor
- Changing Agent ACD State from Nextiva Unity Supervisor
- Customizing Statistics in Nextiva Unity Supervisor
- Configuring Thresholds from Nextiva Unity Supervisor