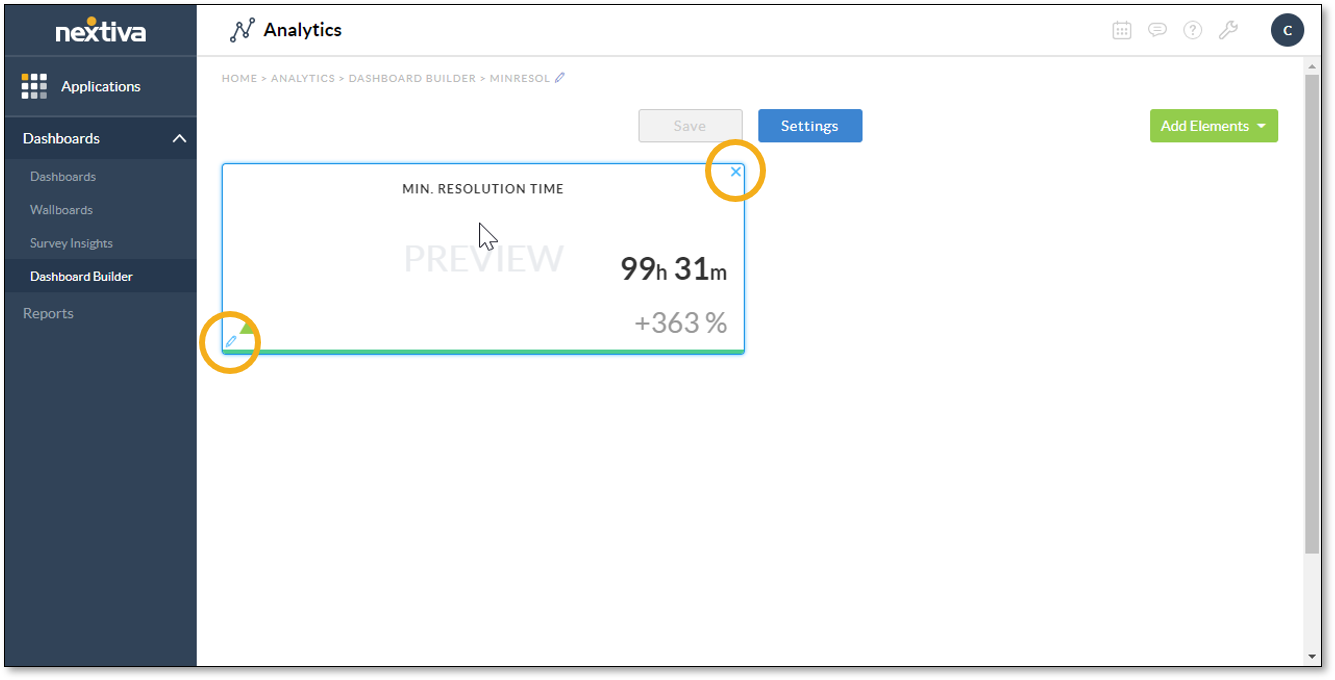
Modify the metric tile element to change its appearance on the dashboard while modifying a dashboard or while creating one from scratch or from a system-generated template. Metric tiles also apply to wallboards.
On the dashboard preview page, modify the metric tile element in one or more of the following ways:
- Reposition the metric tile by clicking and dragging it across the dashboard canvas.
- Edit the configuration of each metric tile by clicking the Pencil icon in the bottom-left corner of the tile, then making changes to the fields in the Metric Tile Configuration dialog box. The Pencil icon appears when the cursor hovers over the tile. For information on metric tile configuration, click here.
- Remove the metric tile by clicking the X at the top-right corner of the tile. The X appears when the cursor hovers over the metric tile.

Related Articles:
- What is Dashboard Builder in NextOS Analytics?
- Creating Standard Dashboards in NextOS Analytics
- Creating Wallboards in NextOS Analytics
- Adding Reports to Dashboards in NextOS Analytics
- Adding Metric Tiles to Dashboards in NextOS Analytics
- Renaming Dashboards in NextOS Analytics
- Modifying the Report Element on Dashboards in NextOS Analytics
- Configuring Dashboard Settings in NextOS Analytics
- Duplicating Dashboards in NextOS Analytics
- Deleting Dashboards in NextOS Analytics
- Using Dashboard Templates in NextOS Analytics
