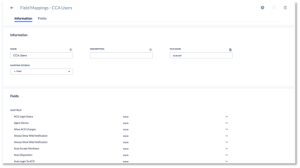
Field mappings are essential for converting external objects, such as CSV tables, into Nextiva’s native JSON objects. This process allows the Nextiva application to seamlessly use imported items by mapping data fields from the CSV file to fields within Nextiva JSON objects. Proper formatting of the CSV file is crucial for this functionality.
Field mappings are versatile and can be utilized in various scenarios within Nextiva, including campaigns for mapping leads for the dialer and in Load Objects for importing contacts, consent numbers, DNC lists, and more.
Creating a Field Mapping
Search for the Field Mapping icon in the Options Menu. Click Plus (+) to the right of the Search field. Enter the required information under each tab.

Information Tab
| Syntax | Description |
| Name | The name of the Field Mapping. The name you enter should be meaningful so other administrators can easily understand it and make it easy for you to know when assigning Field Mappings to campaigns or loading objects. |
| Description | The description of the Field Mapping. |
| File Name | Where you select the file, you wish to import. Field Mappings will take the headers from the file and make them available in the Map Field section. |
| Mapping Schema | The target JSON object in Nextiva. Different schemas will have different fields for your data. |
NOTE: Once you have created the field mapping, you can reuse it every time you import data so long as the CSV file contains the same format each time you import.
Fields Tab
The Fields Tab is where the Map Fields are. Here is where the JSON fields are, and a drop-down on each with the list of CSV headers is provided, hence creating the map.
Assigning a Field Mapping to a Campaign
Once you have created the Field Mapping, you can assign it to a campaign.
Search for the Campaign icon in the Options Menu and select the campaign. Scroll down to Field Mapping and select the File icon to choose a field mapping to upload predictive and progressive lists. Click OK.
You can also use Field Mapping under Load Objects to upload a large list. For example, adding a large number of contacts, campaign addresses, or phone numbers to your company’s local do-not-call list.
Select the File icon to the right of Field Mappings and select the field mapping. Click OK.