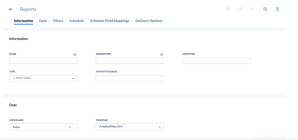
Reports are generated on historical data regarding workitems, campaigns, queues, agents, agent scripting data, customer surveys, and more. Nextiva provides the following out-of-the-box reports for Supervisors and Administrators to run manually or schedule for email and/or SFTP. Reports are also available in Microsoft Power BI format for customers who need customizations and changes. All reports have filters on campaigns, queues, users, dates, and time intervals.
Nextiva offers the following reports:
Agents
- Agent Call Detail Report
- Agent Disposition Report
- Agent Login Report
- Agent Media Handle Time Report
- Agent Media Volume Report
- Agent Occupancy Report
- Agent RPC (Right Party Contact) Report
- Agent Scorecards Report
- Agent Status Report
- Agent Workitem Detail
Campaigns
- Campaign Disposition Report
- Campaign Queue Interval Report
- Campaign Queue Summary Report
- Campaign Scorecards Report
- Campaign Volume Summary Report
- Campaign Workitem Details Report
Queues
- Queue SLA Report
- Queue Abandon Detail Report
- Queue Interval
Report Outbound / Dialer
- Failed Outbound Leads Report
- Outbound Detail Disposition Report
- Outbound Detailed Report
- Outbound Dialer Summary Report
- Outbound List Disposition Summary Report
- Outbound Scrub Summary Report
- Outbound Summary Report
- Outbound Summary Attempts
Report Survey/Scripting
- Survey Statistics Report
- Detail Survey Workitems Report
Creating Reports
Search for the Report icon in the Options Menu. Click Plus (+) to the right of the Search field. Add a name for the newly created report. Then select what type of report you want to create/generate. Also, select all the appropriate filters. Click Save.

Running Reports
Navigate to the report you wish to run and press the Run Report button in the upper right corner.

Scheduled Reports
You can set up scheduled reports by configuring the fields in the Schedule tab of any report. The Schedule Tab will have the following sections: Schedule and Delivery Options.
NOTE: The report will run on the filters and date ranges specified in the configuration of the report.
| Field Name | Description |
| Run Report As | Which user the scheduled report should be run as. Different users have different permissions regarding filters, so different data will be displayed. |
|
Time |
Which Business Event rules should be applied for when the report should be executed. |
|
Email Attachment Name |
The file name of the report that will be sent in an email after it’s run. |
|
Export Format |
The only currently supported option is CSV. |
|
CSV Separator |
This is used if a CSV separator different from a comma is needed. For example, a semicolon. |
|
Exclude CSV Headers |
If enabled, the titles of columns will be excluded from the CSV file. |
|
Raw data |
If enabled, the data will not be formatted in the CSV file. |
Delivery Options
| Field Name | Description |
|
Email Account |
The email service account that will be used to send the reports out. |
|
Email Recipients |
The list of email addresses of whom to send the report to. They will be separated by commas or semicolons. |
|
Email Subject |
The subject of the email that is sent out for the report. |
|
File Server |
This is used if the reports should be sent to a secure FTP server. |
Restricted Users
List specific users whose report visibility will be modified to show only the reports they are associated with.
Report Detail
In the Filters section of a report configuration page, you can add or delete users to a report.
Report List
When a user logs in, these are the reports listed in the Users section.