Use dashboard templates as a starting point to create new dashboards.
- Visit nextiva.com, and click Client Login to log in to NextOS.
- From the NextOS Home Page, select Analytics.
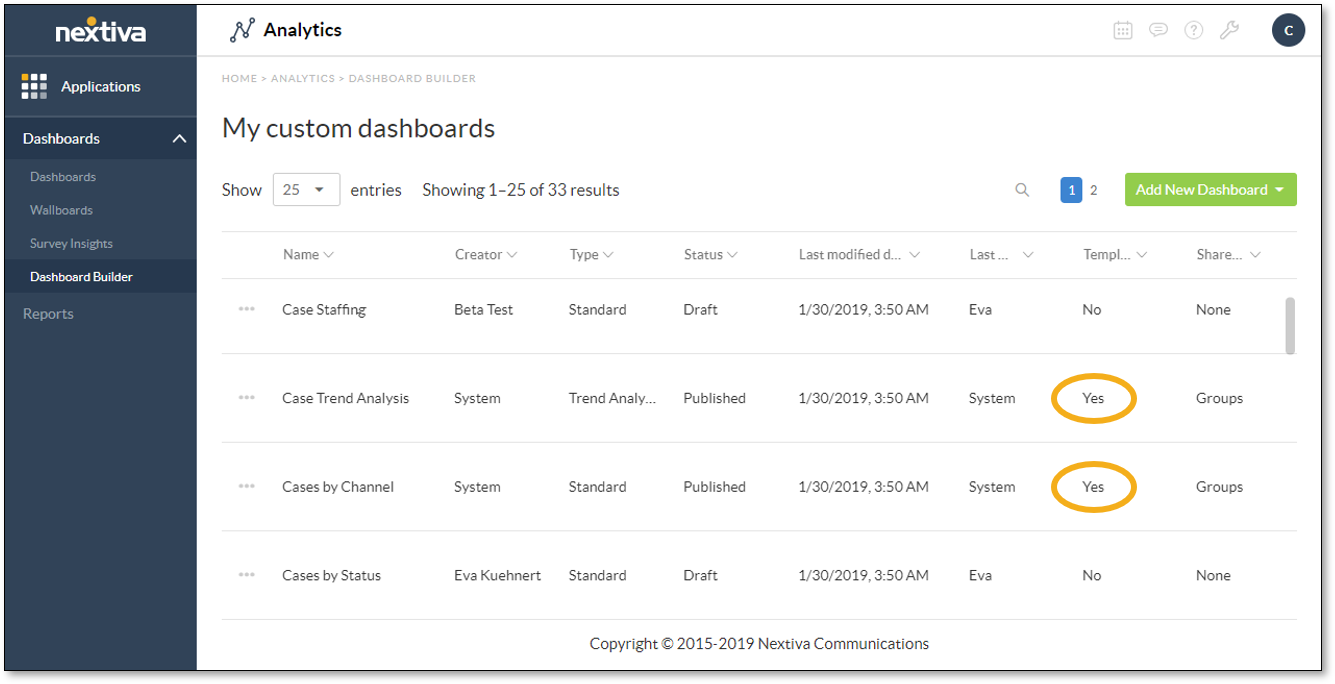
- In the left navigation panel, click Dashboards, then select Dashboard Builder. The system-generated dashboard templates, indicated by “Yes” in the Template column, are available in the Dashboard Builder view.

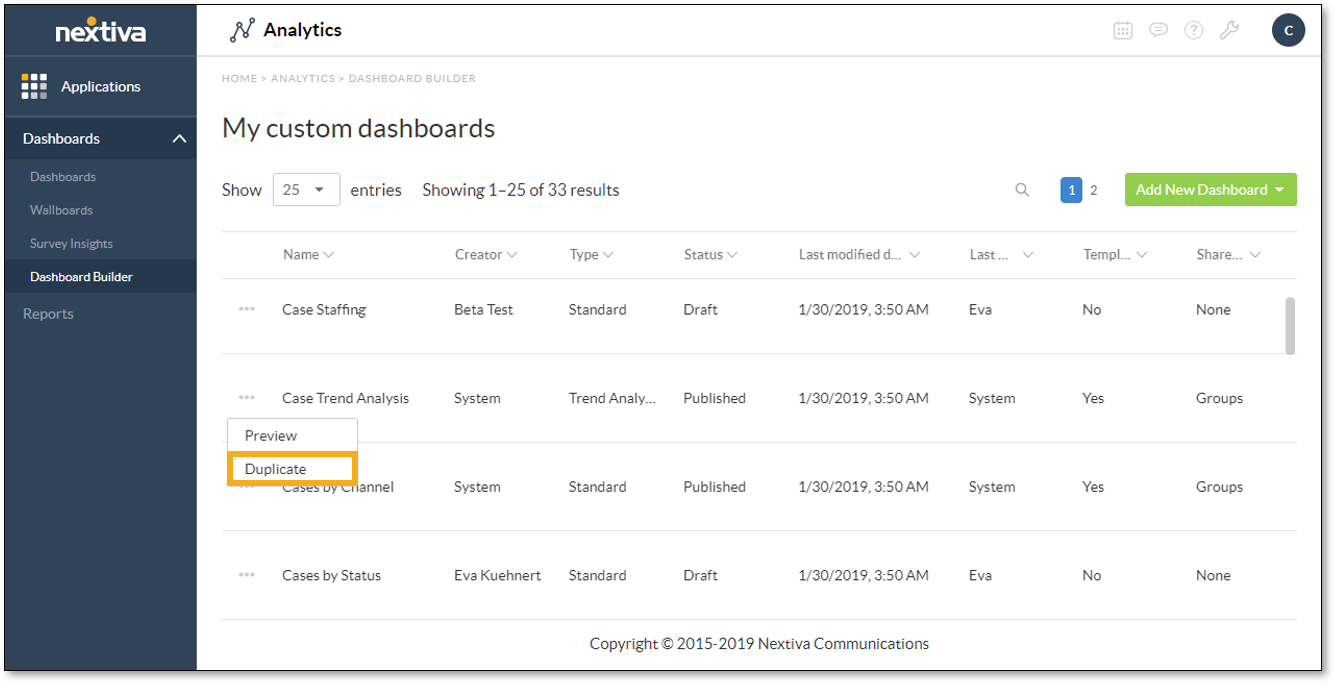
- Click the Ellipsis (…) icon corresponding to the desired template, then select Duplicate. Select Preview to preview the design of the dashboard template.

- Rename the dashboard.
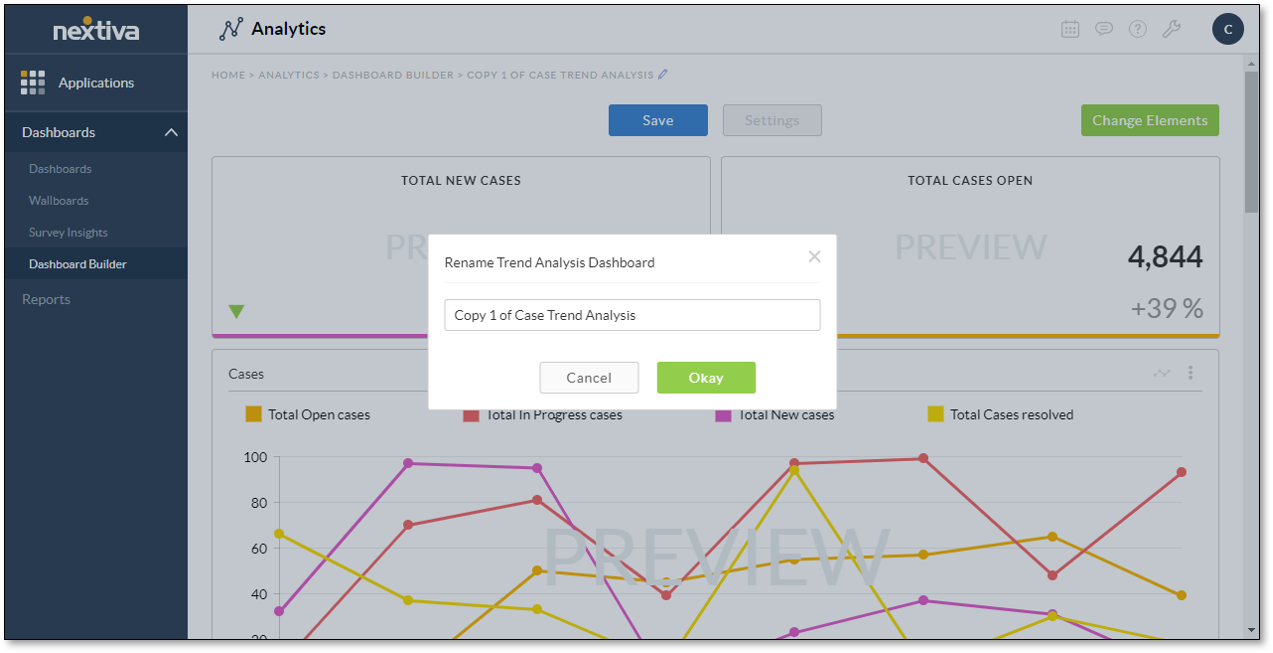
- Click the Pencil icon in the breadcrumb at the top of the Dashboard Preview page.
![]()
- In the Rename Dashboard dialog box, change the name of the dashboard.
- Click Okay.

- Click the Change Elements button, then make the desired changes to the elements of the dashboard and click Save. For information on the Report element of dashboards, click here. For information on the Metric Tile element of dashboards, click here.
- Click Settings to configure the dashboard settings, then click Save. For information on configuring the dashboard settings, click here.
- Close the Settings window by clicking Cancel or the X at the top-right corner of the window.
Related Articles:
- What is Dashboard Builder in NextOS Analytics?
- Creating Standard Dashboards in NextOS Analytics
- Creating Wallboards in NextOS Analytics
- Adding Reports to Dashboards in NextOS Analytics
- Adding Metric Tiles to Dashboards in NextOS Analytics
- Renaming Dashboards in NextOS Analytics
- Modifying the Report Element on Dashboards in NextOS Analytics
- Modifying the Metric Tile Element on Dashboards in NextOS Analytics
- Configuring Dashboard Settings in NextOS Analytics
- Duplicating Dashboards in NextOS Analytics
- Deleting Dashboards in NextOS Analytics
