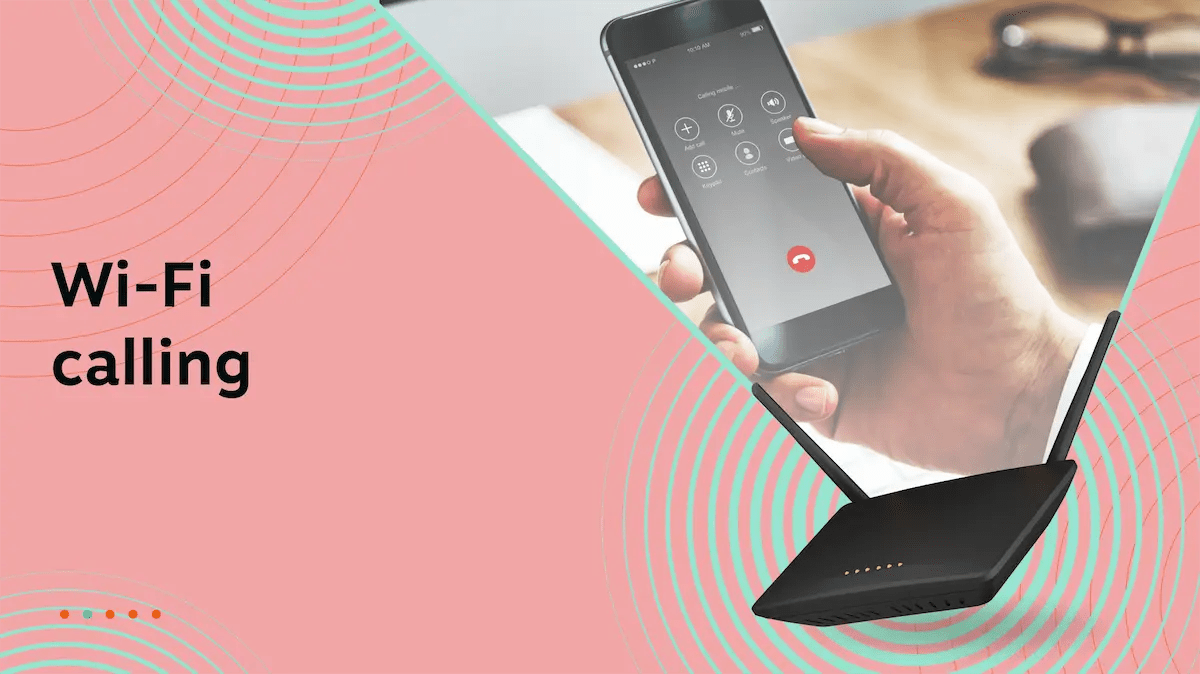


 VoIP
VoIP 

Upgrading to a Voice over Internet Protocol (VoIP) phone system offers great benefits but can seem complex. This guide provides a step-by-step process for successful VoIP installation, addressing concerns about downtime and compatibility, and covering everything from initial planning to troubleshooting.
Prepare To Install VoIP
You’ll first want to gather details about your voice communication needs to set up a VoIP phone service.
1) Assess your needs
Before exploring VoIP providers, get a clear picture of your business requirements. Many businesses rush into implementing a new phone system without fully understanding their needs, leading to frustration and wasted resources.
Start by counting everyone who will use the business phone system, including both in-office and remote employees, and consider future growth from planned hiring. List all active business phone numbers currently in use and review a recent phone bill to understand your calling patterns — how often you call, peak times, and common destinations.
Be realistic about your budget, including not just monthly service costs but also setup fees, hardware, and add-on features. If your industry has specific regulations regarding call recording, data retention, or emergency services, understand these requirements.
Consider your communication needs as well. Remote team members will need softphone apps for various devices. For international communication, affordable international calling options are essential. Understanding these requirements upfront will help you find the right VoIP platform and avoid costly changes later.

2) Prioritize communication features
VoIP systems offer many features, but not all will be crucial for your business. Identifying your essential needs will help you avoid overspending and choose the right provider. Focus on VoIP features that directly improve efficiency and customer service.
Consider the following features, prioritizing those that are critical for your operations:
- Auto attendant or interactive voice response (IVR): Automated system to greet and direct callers.
- Call routing: Directs VoIP calls to specific individuals or groups.
- Video conferencing: Enables face-to-face meetings remotely.
- Instant messaging: Facilitates quick, internal communication.
- Voicemail transcription: Converts voicemails to text for easy reading.
When comparing providers, concentrate on your essential feature list. Don’t get swayed by features that add cost without significant benefit to your core operations. A prioritized approach ensures you get the most value from your VoIP system.

3) Check your internet connection
VoIP call quality depends heavily on a stable and fast internet connection. Make sure your internet is up to the task before implementing. Start by looking at bandwidth requirements. You need roughly 100 Kbps (0.1 Mbps) of upload bandwidth per active phone line. For example, 10 simultaneous calls require at least 1 Mbps upload. Note that upload speed, often less emphasized than download speed, is vital for VoIP.
Beyond bandwidth, latency and jitter are important considerations. Low latency is key, and you should aim for latency below 150 milliseconds. Also, check for jitter (variation in latency), which should be minimal for clear audio.
To test, use online speed tests specifically for VoIP. VoIP speed tests simulate voice traffic and measure bandwidth, latency, jitter, and packet loss, providing a realistic assessment. General speed tests may not be enough.

If tests reveal problems, there are a few possible solutions. First, make sure your router is up to date. A router with QoS (Quality of Service) can be very beneficial, as it can prioritize VoIP traffic. Finally, if problems persist, you may have to consider upgrading your internet plan to one with sufficient upload bandwidth and low latency.
4) Gather your equipment
A major benefit of VoIP is its flexibility with device options. Softphones are applications that turn your computer, smartphone, or tablet into a phone and are ideal for remote workers or those who don’t need a dedicated phone line or desk phone.
If you prefer traditional desk phones, VoIP phones connect to your network instead of a phone line, offering features like speed dial, call transfer, and conference calling. You can also use existing analog phones with a VoIP system through a VoIP adapter called an Analog Telephone Adapter (ATA), which converts analog voice signals to digital signals. Investing in high-quality VoIP hardware is crucial to avoid common issues and enhance functionality.

When selecting VoIP desk phones, consider features like the number of lines supported, speakerphone quality, display size, and headset compatibility. Ensure the phones are compatible with your chosen VoIP provider, as some only support specific models.
For network equipment, you’ll need:
- A router that supports QoS features
- Ethernet cables for connecting desk phones
- Power adapters (unless using Power over Ethernet)
- Optionally, headsets and a PoE switch
Prices for VoIP phones range from under $100 to several hundred dollars. Your provider may offer discounts or rebates, especially with long-term contracts. It’s wise to test a few phones before making a large purchase to ensure they work well with your network and service.
5) Choose a VoIP phone system provider
With your needs clearly defined, it’s time to select a reliable hosted VoIP service that aligns with your requirements.
When evaluating VoIP providers, consider feature compatibility with your must-have list and pricing structure alignment with your budget. The quality and availability of customer support can make a significant difference during setup and troubleshooting issues. Assess each provider’s scalability options as your business grows, integration capabilities with your existing devices, and contract terms flexibility.
Many VoIP providers offer free trials or demos. Take advantage of these opportunities to test the service before committing to ensure it meets your expectations in real-world conditions.


VoIP Installation Steps (Step-by-Step Guide)

Step 1: Sign up with your VoIP provider
Once you’ve chosen a provider, set up your VoIP. Create an account through their website and select your service plan based on your needs assessment. You’ll need to decide whether to get new phone numbers or port your existing ones.
Most providers make this process straightforward through their online signup portal. You’ll typically need to provide your business information and payment details and select your initial service level. Don’t worry about getting everything perfect — many settings can be adjusted later as you learn more about the system’s capabilities.
Step 2: Transfer phone numbers
Keeping your existing phone numbers is crucial for business continuity, and this process, called “porting,” requires careful attention. You’ll need a copy of your most recent phone bill, containing important information like your account number and the numbers you want to transfer.
Your new provider will supply a letter of authorization (LOA) form, which permits them to request the number transfer. Complete this form accurately, as errors can cause delays. The porting process may take from a few days to several weeks, depending on your current provider and the complexity of your telephone system.
Importantly, do not cancel your service with your old provider until porting is complete, or you risk losing your numbers. If you need to switch immediately, consider using temporary numbers from your new provider until your existing numbers can be ported.
Step 3: Configure Your VoIP Account
Access your provider’s online portal to set up your account. This is where you’ll configure users, call flows, and features that customize your phone system.
Add and manage users
Determine who needs access to your business phone system, which may differ from your total headcount. For each user, gather their name, email address, department, job title, direct phone number (if applicable), extension number, and home address for remote workers (essential for E911 emergency services).
Consider permission levels — what features should each user access? Different roles may require different permissions for functions like call recording, international calling, or voicemail transcription.
Create a logical extension numbering system that’s consistent and memorable. Consider setting up ring groups that allow incoming calls to ring multiple phones simultaneously, which is useful for departments like sales or support.

Design your call flow
Create a professional experience for callers with a well-designed auto attendant system that greets them and provides guidance. When setting up your call flow, include a concise, professional main greeting and clear menu options for departments like Sales or Support.
Plan how calls will be handled outside business hours and during holidays. Decide if callers should have the option to dial extensions directly to reach specific individuals.

As James Bucki from The Balance notes, “There are two types of callers: people who are unfamiliar with your company and will need guidance, and callers who know exactly who they need to speak to and know their extension.”
Write out your auto-attendant script to ensure concise, consistent messaging. Record your greetings in a quiet environment, speaking clearly and at a moderate pace. Consider professional recording for a more polished impression.
Step 4: Connect your equipment
Getting your devices working with your new system is typically straightforward. The process varies slightly depending on the type of equipment you’re using:
- For softphones, download your VoIP provider’s desktop or mobile phone app, install it following on-screen instructions, log in with credentials provided by your provider, and configure settings like microphone selection and notification preferences.
- For VoIP desk phones, connect them to your network with an Ethernet cable. If you have Power over Ethernet (PoE) switches, the phone will power on automatically; otherwise, use the phone’s power adapter. Through your provider’s web portal, associate each physical phone with a specific user and extension using the phone’s MAC address.
To connect and activate an IP phone, follow the detailed instructions provided by your VoIP provider, ensuring proper configuration based on your specific goals and budget.

For analog phones with an ATA, connect the adapter to your router with an Ethernet cable, connect your analog phone to the ATA’s phone port, connect the power adapter, and configure it according to your provider’s instructions.
Make test calls from and to each device to verify the proper connection before proceeding to the next step.
Step 5: Configure your router for QoS
QoS settings in your router prioritize voice traffic over other internet activities, ensuring call quality even when your network is busy. Access your router’s administration interface (typically by typing an IP address like 192.168.1.1 in your browser) and locate the QoS settings.
Enable QoS and configure it to prioritize VoIP traffic according to your router’s documentation. Consider disabling SIP ALG in your router’s configuration interface, as this setting often causes problems despite being intended to help with VoIP. Ensure your firewall isn’t blocking any ports required by your VoIP provider.
This step is crucial for maintaining call quality, especially if your internet connection is shared among multiple users or applications. If you’re unsure about these settings, most VoIP providers offer guidance specific to common router models.

Step 6: Test and verify your system
Once everything is set up, thorough testing is essential. Even small network issues can impact call quality. Start with basic call tests:
- Call your main business number from an external phone like your cell phone
- Make an outbound call from your business line to an external phone
- Test voice calls between different extensions within your office
Also, test the ability to receive phone calls to ensure your system is functioning correctly. Make a longer test call lasting at least 20 minutes to identify any intermittent audio issues that might not appear in shorter conversations. While testing, listen carefully for audio quality issues including dropouts, echoes, choppiness, static, or one-way audio problems.
Next, confirm your number of assignments. Make test calls to each direct number to verify it rings the correct phone or extension. Call each extension from another internal phone and test your ring groups to confirm all assigned phones ring when that number is called.
By default, your outbound caller ID might show your company’s main number, even for calls made from individual extensions. You can customize this through your VoIP provider’s web portal. Verify what number is being displayed for your outbound calls by calling 1-800-444-4444 (MCI’s Automated Number Announcement Circuit), which will tell you the Automatic Number Identification (ANI) for your line.

Step 7: Set up advanced features
Now that your basic system is functioning, it’s time to configure additional features that enhance your communication capabilities.
Record voicemail greetings
A good voicemail greeting makes a professional impression and sets clear expectations. Plan different greetings for individuals, departments, and out-of-office situations. It’s helpful to write a script before recording to stay concise and avoid awkward pauses.
Your greeting should include your name or department name, your position (optional), a brief apology for missing the call, instructions for leaving a message, your expected response timeframe, and alternative contact methods if appropriate. Speak clearly and slowly in a quiet environment when recording.

Activate additional VoIP features
Your provider’s web portal will list available features that can improve productivity and customer service. Popular options include:
- Call forwarding allows automatic call routing to your cell phone or a colleague when you’re unavailable.
- Online faxing enables sending and receiving faxes over your VoIP network, just like email.
- Call recording provides actionable training opportunities for your sales or customer support teams.
- Business text messaging facilitates SMS text exchanges with customers using the same app for phone calls.
- Call screening helps block unwanted robocalls so customers can reach you without interference.
Start by activating features strategically rather than all at once, focusing on those that will have the biggest impact on your business. Configure each feature according to your specific needs. Using a VoIP server for managing unified communication tools can offer cost savings on international calls, additional features, and the benefits of a digital communication infrastructure compared to traditional phone systems.
The most crucial step is training your team. New features provide no benefit if your staff doesn’t know how to use them. Provide clear instructions and consider creating short how-to guides or videos. Finally, document all configurations for easy reference and handoff to new team members in the future. You’re ready to start making VoIP calls.
Troubleshooting Common VoIP Issues
Even with careful planning, you may encounter issues. Here are solutions to common VoIP problems:
No dial tone
If you’re not getting a dial tone, check all power connections and verify Ethernet cable connections. Restart the phone/ATA and router, as many issues can be resolved with a simple reboot. Confirm your VoIP phone service is active by logging into your provider’s portal or contacting their support team.
Poor call quality (choppy audio, echo, delay)
When experiencing poor call quality, run another internet speed test to verify adequate bandwidth is available. Check for network congestion from other activities like downloads or streaming services that might be competing for bandwidth.
Ensure QoS is properly configured in your router settings to prioritize voice traffic. If using Wi-Fi, try switching to wired connections if possible, as this often provides more stable performance. If issues persist after trying these steps, contact your provider’s technical support for assistance.

One-way audio
One-way audio issues (where you can hear the caller but they can’t hear you, or vice versa) often stem from microphone and speaker settings, especially with softphones. Verify these settings and check that your firewall isn’t blocking VoIP traffic.
Testing with different devices can help isolate whether the problem is with a specific device or your network configuration. Document exactly when and how the problem occurs before contacting your provider’s technical support, as this information will help them diagnose the issue more quickly.
Dropped calls
For dropped calls, monitor your internet connection stability using continuous ping tests or connection monitoring tools. Check for interference or signal issues with wireless connections and update firmware on phones and network equipment to the latest versions.
Document when and how frequently calls drop to help troubleshoot the pattern. Sometimes, dropped calls indicate issues with your internet service provider rather than your VoIP system, so having this documentation will help determine the source of the problem.

Business VoIP Installation Checklist
Here’s a handy implementation checklist summarizing the big picture for researching, setting up, and enjoying a new VoIP system:
| I. Research | II. Migration | III. Post-setup |
|---|---|---|
| Define phone system needs Users, phone numbers, extensions, and must-haves. | Transfer phone numbers Toll-free, direct-dial, and virtual phone numbers. | Verify connectivity & call quality Incoming calls, outbound calls, and network performance. |
| Identify desired VoIP features Call recording, call queues, conferencing, and email integrations. | Add users and E911 info Usernames, extensions, permissions, and physical addresses for E911. | Confirm phone numbers Outbound caller ID and inbound call paths work as desired. |
| Perform bandwidth tests ~100 Kbps per line with less than 150ms latency. | Install VoIP apps VoIP softphone apps for smartphones and desktops. | Record voicemails Record greetings and messages for future call flows. |
| Select equipment Desk phones, conference phones, headsets, etc. | Set up call flows Auto attendants, holiday schedules, and call routing. | Activate & test extra features Conferencing, recording, faxing, and text messaging. |
Your specific VoIP installation might look different depending on the size of your company, but this template helps you understand how a typical VoIP implementation plan works.
Transition To VoIP With Confidence
Switching to a modern VoIP phone system is easier than you think, especially with the right provider and a well-defined plan. You enjoy enhanced features, improved communication, and cost savings without disrupting your business operations.
Take time to thoroughly research providers, assess your needs, and prepare your network. The initial investment of time will pay dividends in a smoother transition and a communication system that meets your business requirements.
Nextiva has been recognized as a leading business phone system by U.S. News & World Report and G2. We offer a comprehensive suite of features, exceptional customer support, and a seamless onboarding process.
With the right VoIP solution, you’ll enjoy more flexible, feature-rich, and cost-effective communications that can scale with your growth and adapt to changing needs.
The VoIP phone service for modern work.
We’re named the Best Business Phone Service by U.S. News for a reason!
VoIP Installation FAQs
Many modern VoIP phone services offer user-friendly interfaces and guided setup processes for small businesses to install VoIP. The complexity depends on your business size, technical requirements, and the features you need. Basic setups with softphones can be quite straightforward, while larger systems with multiple hardware phones might require more technical knowledge.
For a successful VoIP setup, you need: a reliable high-speed internet connection with sufficient bandwidth, a VoIP service provider subscription, the right VoIP hardware and devices (softphones or VoIP phones), a router that supports VoIP traffic (ideally with QoS features), and power backup solutions to maintain service during outages. You’ll also need to configure your network settings, establish user accounts, and call routing protocols.
To ensure VoIP security, implement strong passwords and enable two-factor authentication for all accounts. Secure your network connection with a dedicated VLAN for voice traffic and properly configured firewalls.
Use encryption protocols like TLS or SRTP for all communications. Keep all software and devices updated with security patches, and train employees on best practices. Regularly monitor your system for unusual activity, and choose a VoIP phone service with robust security features and responsive support.